A recording can have a clear picture and the wrong sound. Decide what you need before you start: your voice, the app’s audio, or both.
Using the built-in Mac recorder
Open Screenshot with Shift + Command + 5. Under Options, select a microphone. On macOS 27 or later, enable Include System Audio for the Mac’s sound. See Apple’s recording guide for the version-specific controls.
Using Moonshot
Open the recording controls and pick a window, area or display. Turn on Microphone for narration and System audio for app sound. Check the selected input device. Webcam is a separate control.
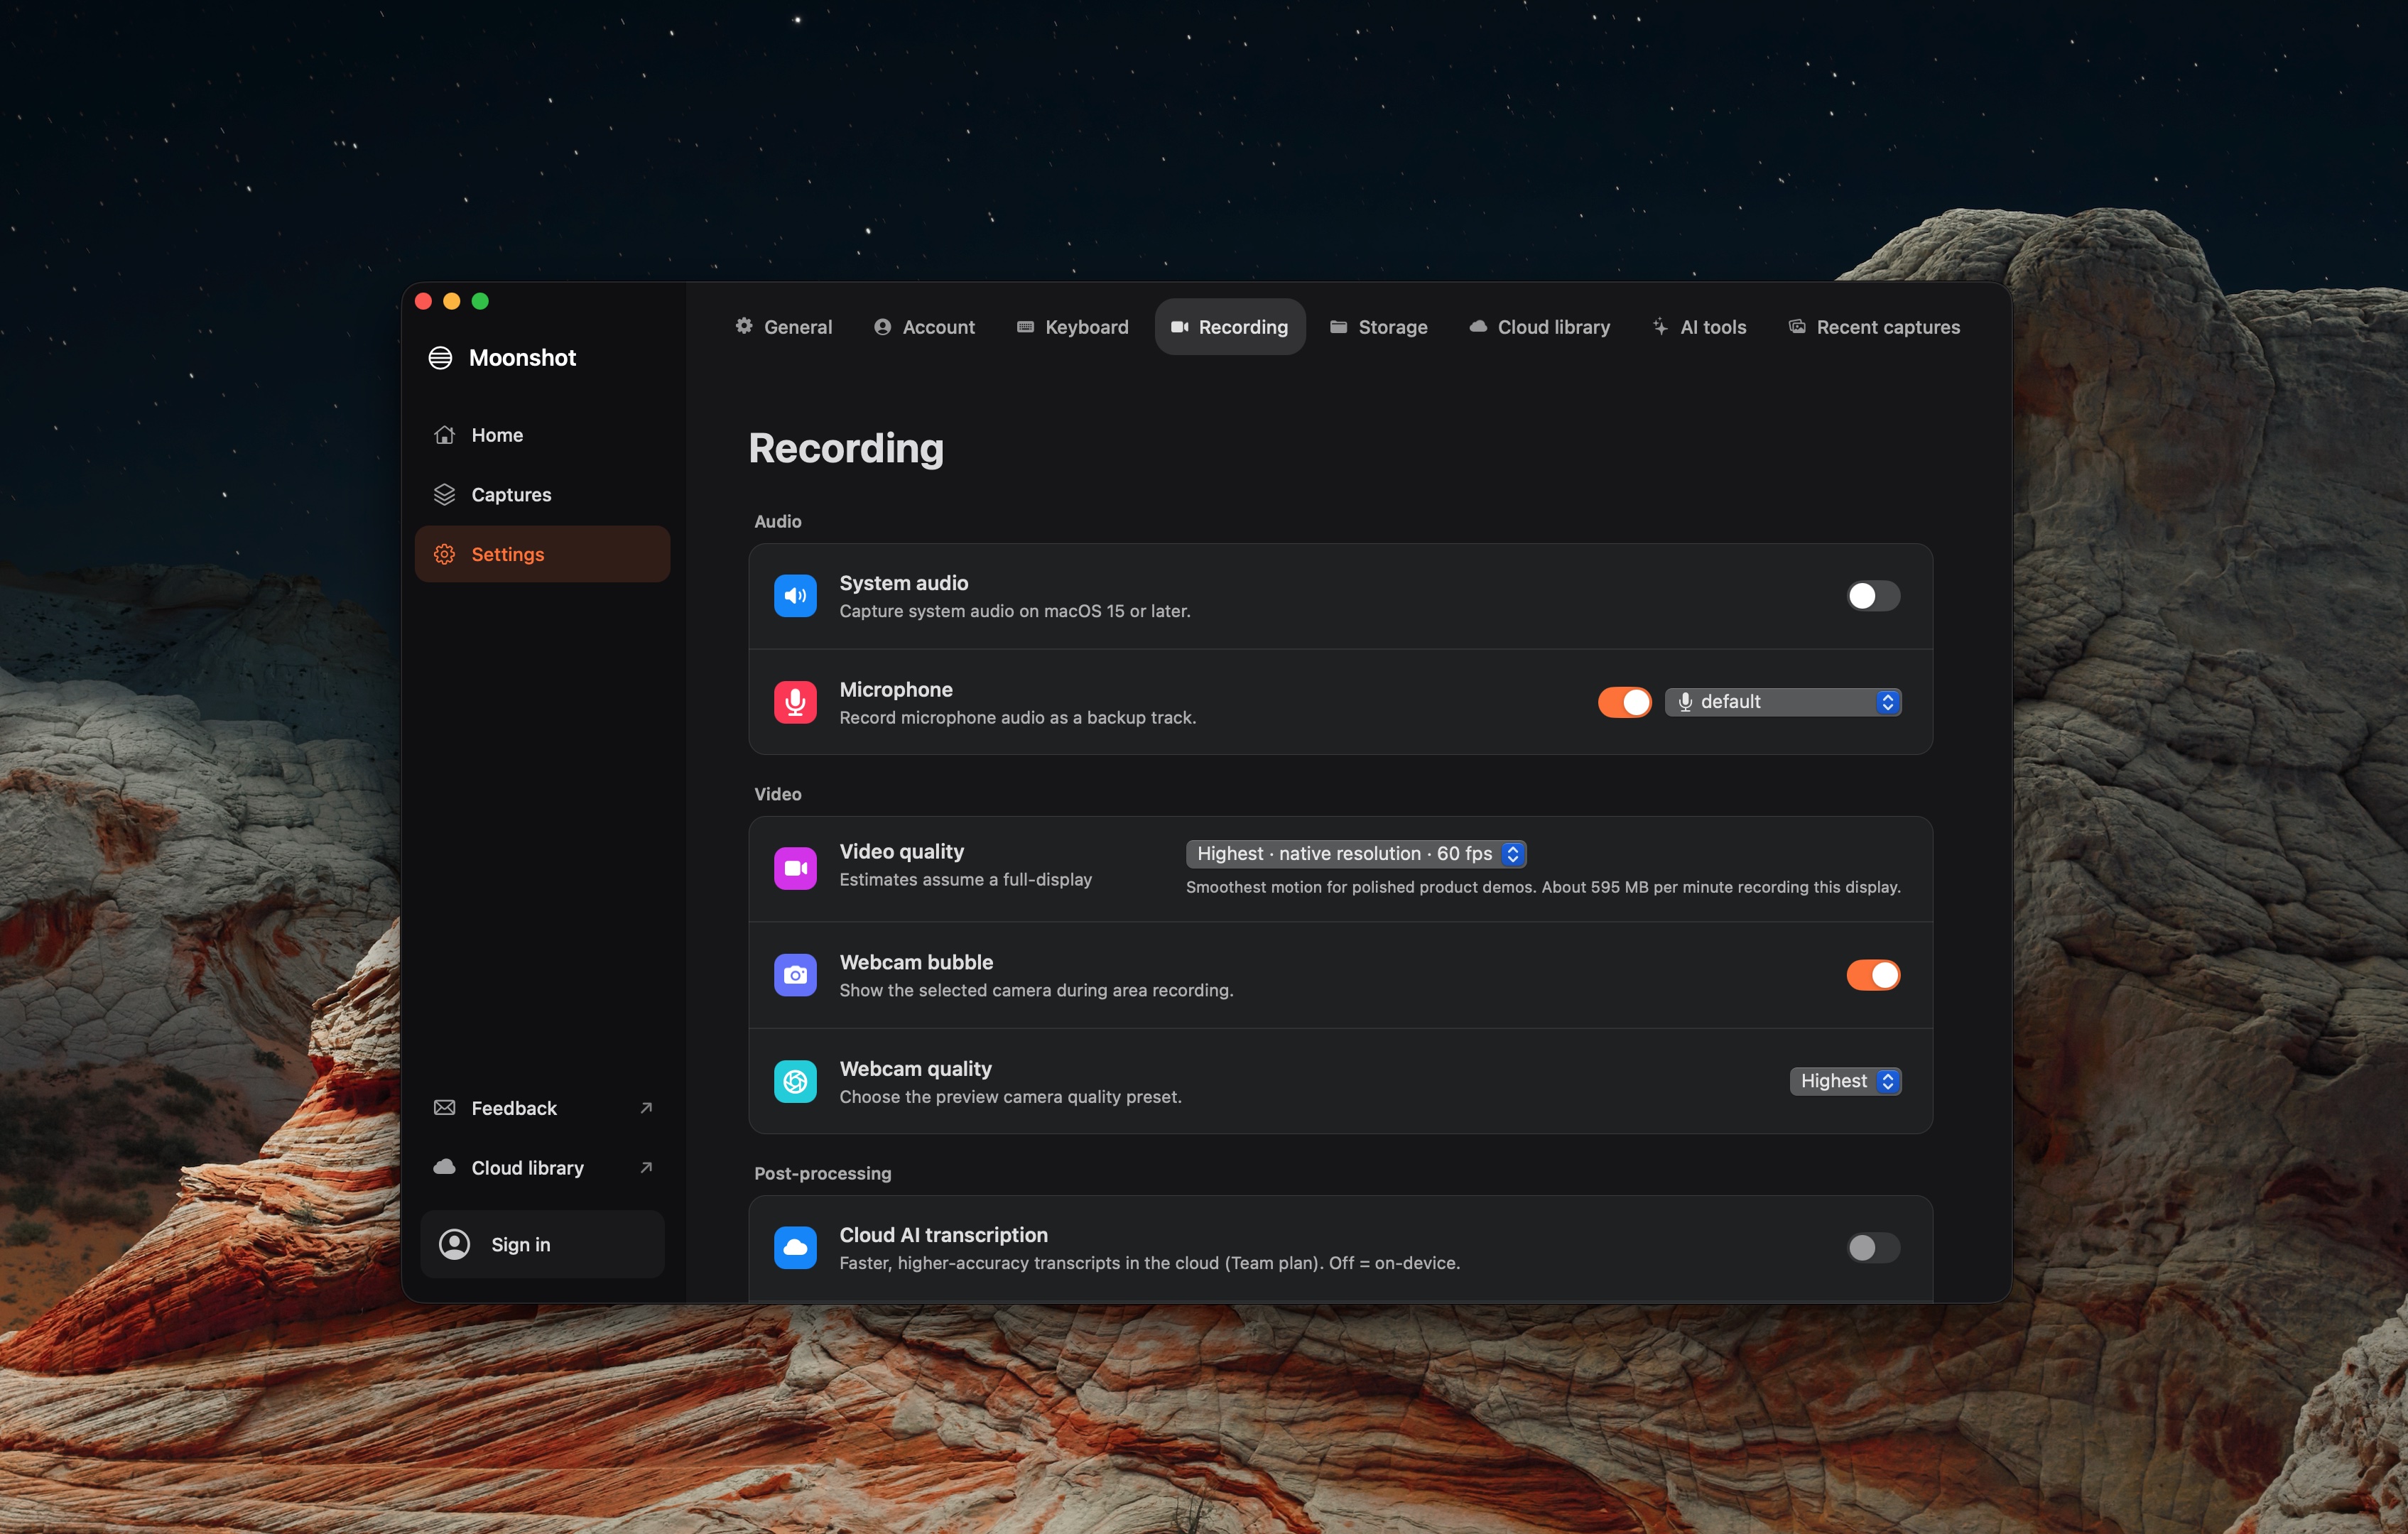
Record a short test. Say a sentence, play a sound in the app, then open the saved video. Check both before recording the full walkthrough. The Mac recorder page covers local capture and sharing.
Check macOS permissions
Open System Settings → Privacy & Security. Check Microphone access for your voice and Screen & System Audio Recording for screen and app sound. The wording can vary with your macOS version.
If narration is still missing, check the chosen input and its level in Sound settings.
Avoid an echo
Use headphones when recording narration over app audio. Otherwise the microphone may pick up the speakers as well as your voice.
Still silent? Follow the no-sound checks to test one input at a time.